Showing posts with label baking. Show all posts

Wednesday, December 19, 2012

Buy it Bulk....

This year I have tried to eat more locally grown food. Farmer markets' is part of our Saturday morning routine, only stopping during the winter months. Leaving us eager for spring. I try to plan through out the spring, summer and fall to stock up and can food to eat during the winter months.

On my quest to be local, I wanted to do something big.... I baked all the time and started baking loaves of bread every other weekend, freezing one of the loaves for the following week. So of course the searching for local flour would be ideal. I found some online, but didn't want to have to pay for shipping. 


Luckily, we have a sweet gem of a store called "The Root Cellar". This store sells produce, dairy, meats and grains from surrounding areas. You can visit their website at www.louisvillerootcellar.com. And after searching through their site, I discovered a FLOUR. They sell flour in small bags, but what caught my eye was the 25 Pound Bag!!


This bag of Kentucky Proud flour costs me $16.00, divide that our each pound of flour cost .64 cents. Now how can you beat that..... So I'm sure the first thing popping in your mind is where can I keep all that flour. I personally use a bucket for HomeDepot. After trial and error, I now put the flour in to a garbage bag in the bucket. This keeps the flour from drying out the lid.

Now depending on the baking needs for the family a 25 pound bag will last me about 2 months. Here lately only a month, thanks to the holiday goodness. I use this flour for everything from pizza dough to cookies to white bread. And this weekend it included Pumpkin Chocolate Chip Bread. Yummy!!


So I would like to encourage everyone to shop and eat local. And don't be afraid of the big bag of flour.

Monday, November 26, 2012

My Fairy Tale Weekend


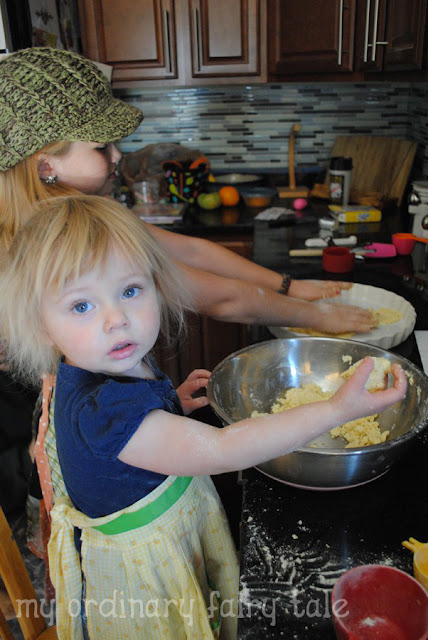
My future bakers' in the making


**Floured**


Black Friday Brunch with Family


Tree Decorated with ornaments old and new


Stocking hung with care
Advent Calendar


Playing with numbered bean bags


Tuesday, November 13, 2012

A Harvest of Autumn

Autumn is my favorite part of the year, with the cool crisp of the wind blowing by, the colors nature transforms into and all the wonderful seasonal produce.

This weekend was pumptastic, yes thats a word, my word. This spring I planted my first pumpkin plants. The plants were on a conquest to conquer the garden all summer. My prize fairy tale pumpkin is (how appropriate) my beautiful 24 pounder.

Pumpkin puree was on my brain, so I started out with the pumpkin and a knife.

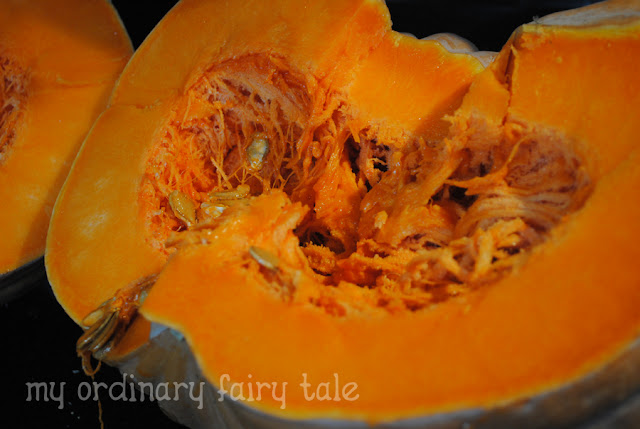
 So first I slice the pumpkin in to half. Now you can notice from the below picture that this pumpkin is full of meat compared to the jack-o-lantern pumpkins. The meat is easily 2 to 3 inches thick.


Then scoop out all the seedy goodness. Now you can save the seeds to eat or to plant in the spring.
Here are few seeds that wanted to get a jump on spring time.


Now for this type of pumpkin, preheat the oven to 400 degrees and move the rack in the center. Lay the slices on a baking sheet and cover with foil.


 Cook for two hours. Now this process took me 6 hours due to the size of my pumpkin. They are ready when a fork can pierce the meat with ease. Remove from the oven to cool, you want then cool enough to handle with your hands.


Once they have cooled, cut the meat from the skin and put it into the food processor. 


Puree the pumpkin until smooth. Then measure the puree out into ziplock storage bags. I measure mine out into 2 cups and 4 cups. Place the bag puree onto a cookie sheet flat and place into the freezer. This method allows you to stack the pumpkin puree in the freezer easier. 

I'm proud to say that I got 22 cups of pumpkin puree from my pumpkin. Now I can dream of pumpkin pasta, breads, muffins, pancakes, pies, and cheesecakes.

Saturday, March 31, 2012

Homemade Goldfish


So I very interested in making snacks and food in general from scratch for the kiddos and hubby. And my little bit loves goldfish, so I should find a recipe and make my own. After finding two recipes that were simpler but different I decided to give it a try. Through trial and error, I merged the two recipes together to get what I feel is a wonderful end result.


Recipe:
6 ounces (1-1/2 cups coarsely grated) sharp cheddar
4 Tablespoons butter
1/2 cup whole wheat flour
1/4 cup all-purpose flour
1/8 teaspoon onion powder
1/8 teaspoon table salt
3 - 4 Tablespoons water

Combine all the ingredients, except the water, in a food processor. Continue running the machine adding 1 Tablespoon of water at a time until the dough forms a ball.

Wrap the dough in plastic wrap and chill it in the fridge for 30 to 45 minutes. This will make it easier to transfer shapes once they are rolled out.

Preheat oven to 350 degrees.

On a lightly floured surface, using a lightly floured rolling pin, roll the dough out to 1/8-inch thickness. This is key to make them into more of a cracker instead of a cookie. 


Form shapes with a cookie cutter, I made one into a fish shape from a strip from an aluminum can. Dipping it in flour here and there to ensure a clean cut. 


Carefully transfer to an ungreased parchment lined cookie sheet. Bake the crackers on the middle rack for 12 to 15 minutes, or until they are barely browned on the edges. Remove from the oven and set the cookie sheet on a rack to cool.


Makes around 100 crackers, depending on the size of your cookie cutters.

While the dough is chillin in the fridge I wanted to make my “cracker” cutter. So I got a coke can and using my shears roughly cut a strip about two inches wide and the full radius of the can. Then using a ruler I got a clean “straight” strip of tin, and covered one edge of the strip with brown tape. Wrapping both sides of the edge. Using a general fish shape I bent the tin for form the shape. Once I was happy with the shape then taped the ends, with a slight overlap, together. And there you have it. But you don’t have to make your own, I also used small cookie cutters to create shapes. And you can even use a ruler and pizza cutter to make “cheez its”


The first batch weren’t very crunchy like a cracker, but making the dough thin as suggested and cooking them a for 18 minutes gave them that cracker crunch I was looking for.

I hope that you enjoy this recipe for you little ones or big ones. They are great snack to have on hand around the house or in the car.