Wednesday, November 28, 2012

Extending my growing season.... Hoop Houses


Mid September, I was busy pulling the last of tomato and pepper plants. Clearing the area for the fall garden to be planted. This year I’m planting green beans, broccoli, carrots, greens, spinach, and lettuce.


Greens 
Garlic for next year

Broccoli


collard greens

lettuce

Rabbits have been an issue, so I’ve covered the plants with chicken wire.

As the first projected frost was anticipated, I need to get the hoop house constructed. We bought some tubing from the hardware store and 6mil plastic. Since my raised beds are not very wide, I was also able to use hula hoops. Hoops and tubing was cut in half, then my hubby screwed them into the inner corner of the raised beds. Then we cut the plastic long enough to cover the beds with excess to close off the ends. Then we simply placed bricks, rocks and broken stepping stones we have around on our property.


On one strip of three beds we cut one long piece of plastic. JP then partially screwed in screws and the top of the tube and into the top of the two corners. Now we can use these to slip the plastic on and off as needed.

Now I can easily uncover the raised beds for watering and warm days. Then fairly quickly get them covered and kept from frost during the night.

I leave you with my evening harvest of lettuce for a dinner salad tonight.


Monday, November 26, 2012

My Fairy Tale Weekend


My future bakers' in the making


**Floured**


Black Friday Brunch with Family


Tree Decorated with ornaments old and new


Stocking hung with care
Advent Calendar


Playing with numbered bean bags


Wednesday, November 21, 2012

Foraging....


The act of looking or searching from food or provisions (noun)
To wander in search of food or previsions (verb)

I did a little foraging this fall; we have black walnut trees on our property. Every fall as the leaves slowly drift to the ground, you hear a soft boom. And green sphere, about the size of a tennis ball, hits the ground.

Last year I attempted to collect and harvest the walnuts out of the hull, but I got part of the way then forgot all about them. This year my parents asked me to collect them several grocery plastic bags full for them. They have retired and have the time to carry out the process. So I collected and collected, surprised how many there were with squirrels all around. After I collected their bags, I kept collecting and asked with they would mind harvesting some for me. In their agreement, I started to collect more about three bags for me. As I passed off the last of the bags, my mom looked back and said it be about a month. I replied, “no problem. I’ve got time.”


A little over a month later, my mom delivered about a ½ a pound of walnuts. And then a few weeks later I got  another bag, this time about a pound. Now I just need to think of all the things to make and use them up. Until then they will sit chilling in the fridge until I’m ready.


Pears, a yummy fall fruit…..but what makes them better is when they are free.


My parents in passing mentioned that in their neighborhood was a couple who had pear trees, but never collected the fruit. They would pass by on their walk and see all the pears laying on the ground, left to rot. So I asked if they would mind asking it they would take some pears. A few days later I get a text saying that they would drop off the pears they collected. When I got home a robust bag of pears sat on the front porch.

That weekend, pears with peeled and cored. The first of the pears were sliced and laid on a rack where then spent the whole day dehydrating.
 
The others were peeled, chopped and cooked in water along with second hand apples from the farmers market.
 
Together they blended into my pearapplesauce….very yummy. Seasoned with honey, brown sugar and cinnamon. Then poured into hot jars to be canned, waiting on the shelf during the cold months ahead.
 
The dried pears are the best, sweet little natural candies. I split the bag with my parents. They are fantastic on granola cereal!!!

Monday, November 19, 2012

My Fairy Tale Weekend

Trying the Hedge Apple at the door to keep spiders out.....we'll see.


Cinnimon rolls in waffle maker....yum

Crazy after nap hair


A hula hoop contest


Playing with pots and pans


Tuesday, November 13, 2012

A Harvest of Autumn

Autumn is my favorite part of the year, with the cool crisp of the wind blowing by, the colors nature transforms into and all the wonderful seasonal produce.

This weekend was pumptastic, yes thats a word, my word. This spring I planted my first pumpkin plants. The plants were on a conquest to conquer the garden all summer. My prize fairy tale pumpkin is (how appropriate) my beautiful 24 pounder.

Pumpkin puree was on my brain, so I started out with the pumpkin and a knife.

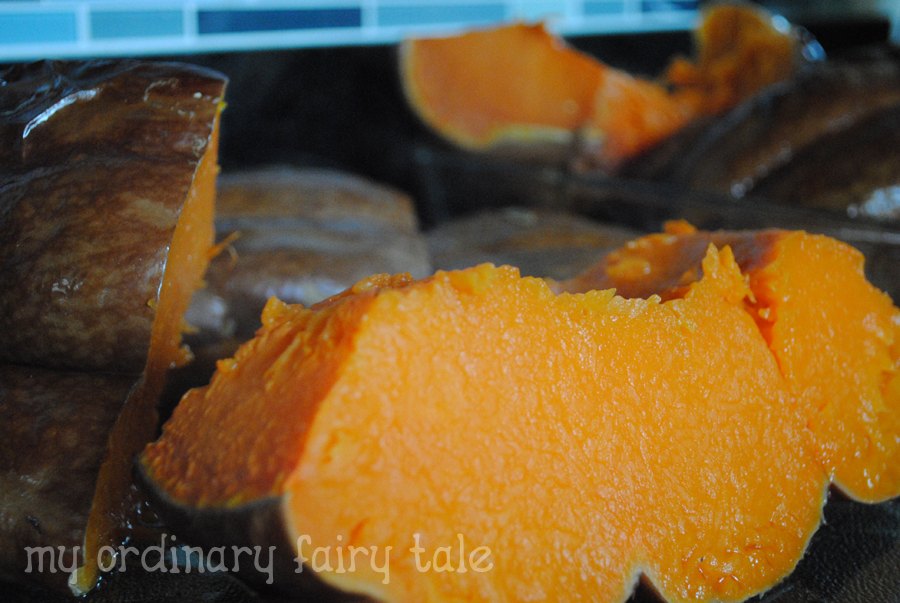
 So first I slice the pumpkin in to half. Now you can notice from the below picture that this pumpkin is full of meat compared to the jack-o-lantern pumpkins. The meat is easily 2 to 3 inches thick.


Then scoop out all the seedy goodness. Now you can save the seeds to eat or to plant in the spring.
Here are few seeds that wanted to get a jump on spring time.


Now for this type of pumpkin, preheat the oven to 400 degrees and move the rack in the center. Lay the slices on a baking sheet and cover with foil.


 Cook for two hours. Now this process took me 6 hours due to the size of my pumpkin. They are ready when a fork can pierce the meat with ease. Remove from the oven to cool, you want then cool enough to handle with your hands.


Once they have cooled, cut the meat from the skin and put it into the food processor. 


Puree the pumpkin until smooth. Then measure the puree out into ziplock storage bags. I measure mine out into 2 cups and 4 cups. Place the bag puree onto a cookie sheet flat and place into the freezer. This method allows you to stack the pumpkin puree in the freezer easier. 

I'm proud to say that I got 22 cups of pumpkin puree from my pumpkin. Now I can dream of pumpkin pasta, breads, muffins, pancakes, pies, and cheesecakes.

Wednesday, August 15, 2012

Preserving Summer, Part 1

Summer is in full stream. Garden is growing and producing goodness everyday. During my evening walk through I see new things growing and ripening.

While the it takes care of itself, and I work on planning our fall garden. Every weekend is full of trying to preserve the taste, flavors and produce of the summer season. My yellow pear tomato and grape tomato plants are in abundance, so I've been oven roasting them. Since I don't yet have a dehydrator, I have to use the oven in between my bread baking schedule.

Oven drying small tomatoes are simple, I got this recipe from one of my favorite blogs, www.digthischick.net. Preheat the oven to 275 degrees. Spray a cookie sheet with oil, then slice all the little tomatoes in half. Placing them on the sheet slice side up, then drizzle with olive oil and sprinkle with salt and pepper.


 Then place in the oven for three hours, around that time start checking the tomatoes. You want them to be dried and leathery, so they may need to cook longer depending on their size.


Then you can store them in an air tight container or place in zip lock bag and toss into the freezer. During the winter pull them out and add to soups, chili or pizza.

Now freezing is another busy task I take on pretty much each weekend. I've been keeping busy with green beans and corn from the farmers market. Now you can find blanching times every where on the internet. I usually turn to pickyourown.org. Each vegetable has there own required blanch time. So you cook them for the time necessary then immediately put the produce into ice cold water, this stops the cooking process.


Then place them into the a zip lock bag, now for a great trick I learned at a 15Thousand Farmers. Once the veggies are in the bag, zip it almost close, stick a straw into the corner. Then suck the air out of the bag, creating a vacuum seal.


With these little things done here and there, my family will be able to enjoy this bounty of summer during the chilliness of winter.